Long gone are the days of wall calendars and personal planners; nowadays, Outlook keeps track of your calendar for you. In this post we’ll explore how to Select a Calendar View, Navigate your Calendar, and Create and Categorize Appointments, and Create Meetings (even from an email!)
Select a Calendar View
- Click the Calendar button on the Navigation Bar.
Outlook displays your calendar. When you switch to Calendar view, the commands on the ribbon will change as well.
- Select a view from the Arrange group on the Home tab (or press the view’s shortcut keys).
- Day: This view shows a single day’s events.
(Ctrl + Alt + 1) - Work Week: This view shows the events for an entire work week.
(Ctrl + Alt + 2) - Week: This view shows an entire week’s events, weekend included.
(Ctrl + Alt + 3) - Month: This view shows the entire month at once, although individual events display fewer detail than other views.
(Ctrl + Alt + 4) - Schedule: This view shows you multiple calendars at once in a way that makes it easy to see what times are free and what times have conflicts.
(Ctrl + Alt + 5)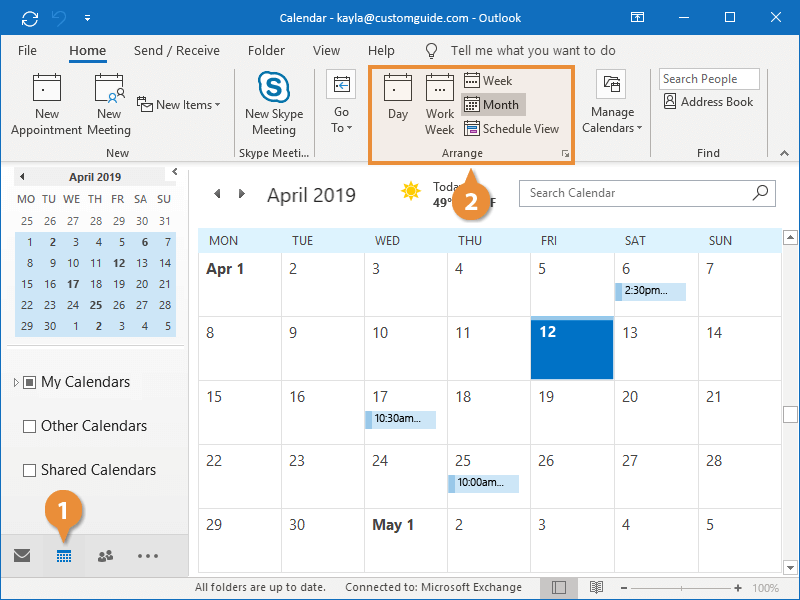
- Day: This view shows a single day’s events.
Navigate Your Calendar
Once you’re viewing the calendar the way you want, you can move through days, weeks, or months.
- Click the Forward or Backward arrows on the calendar.
The calendar displays the next day, week, or month (depending on the view).
If you’re viewing a time where you have no events, Next Appointment and Previous Appointment buttons will appear on the right and left sides of the calendar.
- Click Next Appointment or Previous Appointment.
Outlook jumps to the next event.
You can use the mini calendar on the left to jump to a specific date or week (depending on the view).
- Click a date in the mini-calendar.
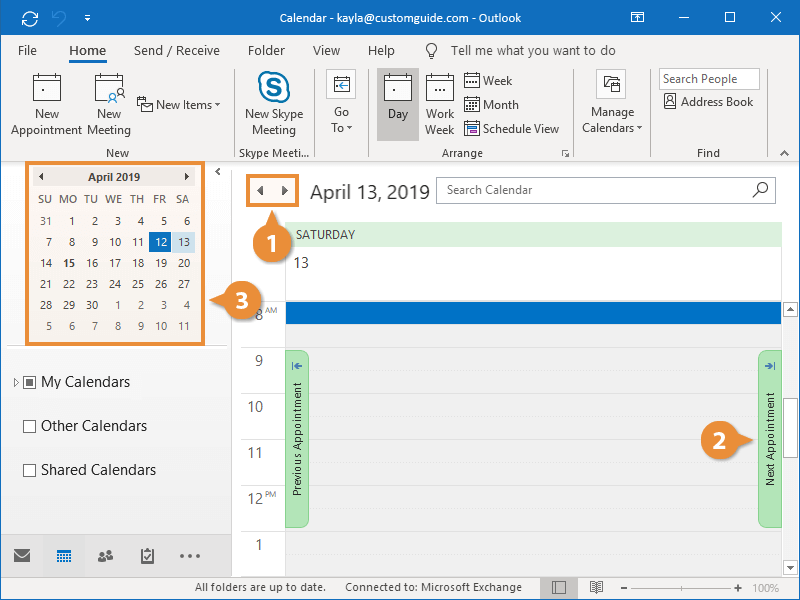
That date is displayed.
No matter where you are in your calendar, you can always return to the current date.
- Expand the Go To group, if necessary.
- Click the Today button.
The calendar returns to the current date. You can also view the next seven days in your calendar for a snapshot of what’s ahead.
- Click the Next 7 Days button.
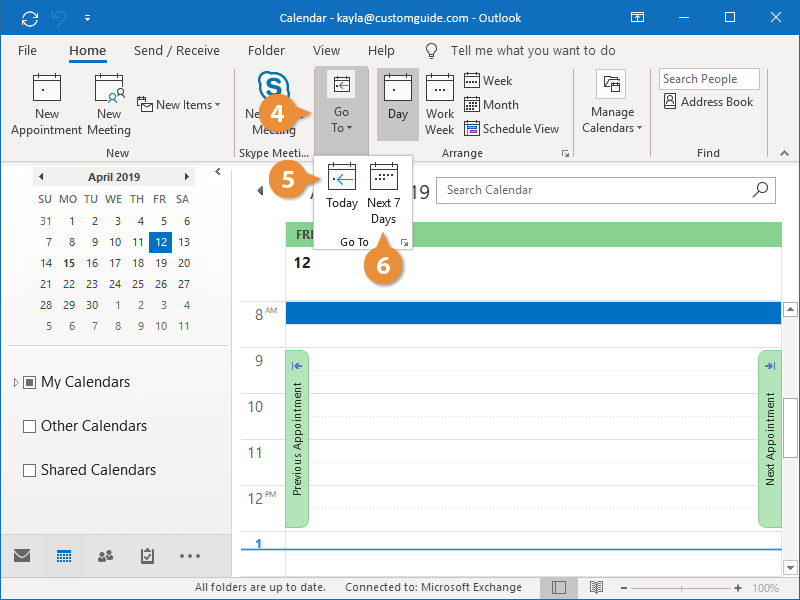
The next seven days are displayed.
An appointment is any scheduled activity that takes place within a one-day period that doesn’t require reserving resources or inviting attendees. This could include setting aside time for research, a doctor’s appointment, or an important dinner with friends or colleagues.
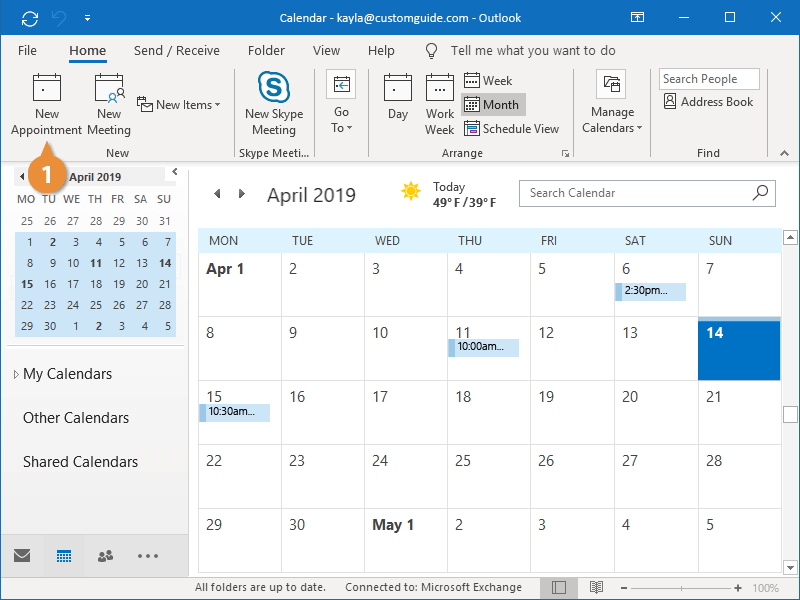
Create an Appointment
- While viewing the calendar, click the New Appointment button on the Home tab.
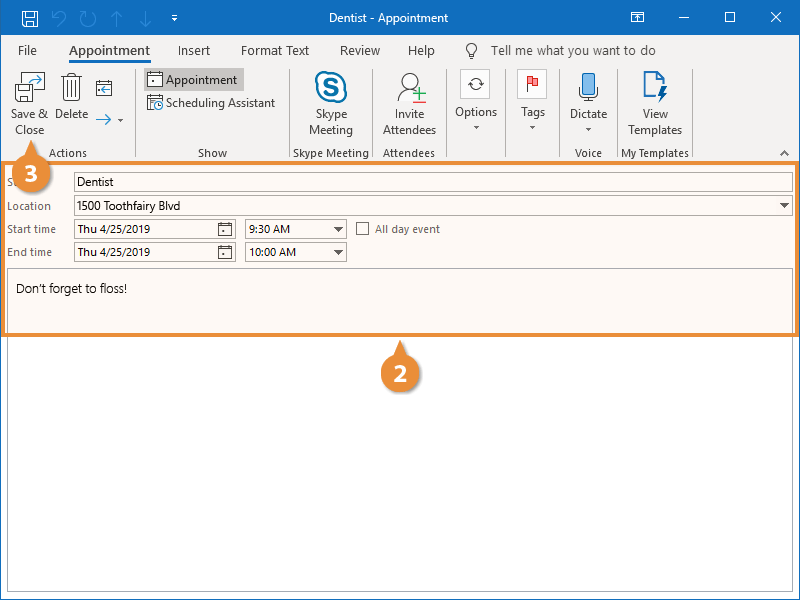
A new appointment window opens, ready for you to fill in the appointment’s details.
- Enter the appointment information:
- Subject
- Location
- Start and End date and time
- Notes
- Click Save & Close.
The new appointment is added to the calendar.
You can also create new appointments from other views, such as Mail, by clicking the New Items button on the Home tab and selecting Appointment.
Press Ctrl + N while viewing the calendar to create a new appointment.
Categorize Appointments
As your calendar starts filling up, it may be hard to tell your appointments apart at a glance. Tagging them with a category can help.
- Select a calendar appointment.
- Click the Categorize button on the ribbon.
A list of categories appears. If you need to create a new category, you can select All Categories.
- Select a category.

The category is applied to the appointment.
Organizing meetings can be difficult when dealing with many different schedules. Using Outlook, you can check invitee schedules before picking a meeting time. That way, you can make the meeting during a time that will work for everyone. You can also track responses to your meeting request to ensure that your most important invitees will be in attendance.
Create a New Meeting
- While in Calendar view, click the New Meeting button on the Home tab.
You can create a meeting from other views by clicking the New Items button on the Home tab and selecting Meeting.
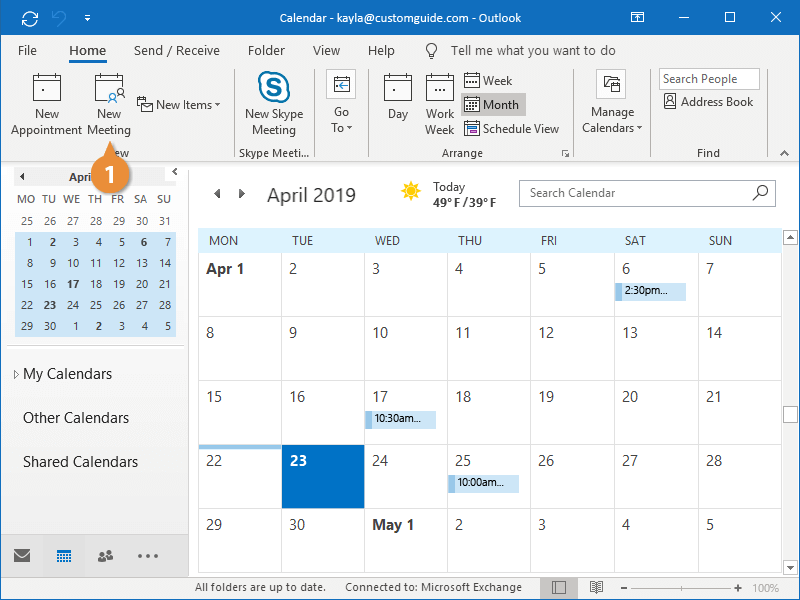
A new Meeting window opens, where you can begin inviting attendees.
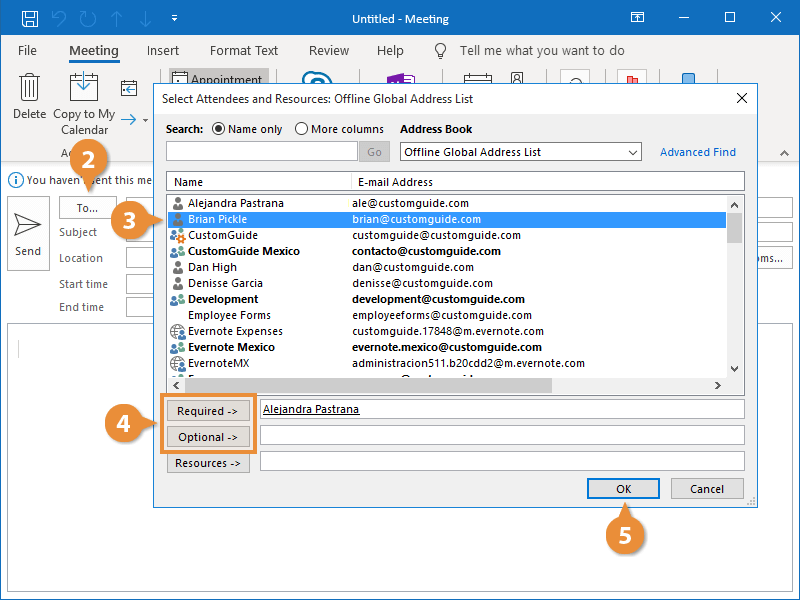
- Click To…
- Select a contact from the Address Book.
Next, choose whether the selected recipient is required to attend the meeting, or if their attendance is optional.
- Click Required or Optional.
Continue to select recipients and assign them as required or optional until you have everyone you need.
- Click OK.
- Enter a subject, location, and notes.
- Enter a date and time manually, or click the Scheduling Assistant button on the Meeting tab.
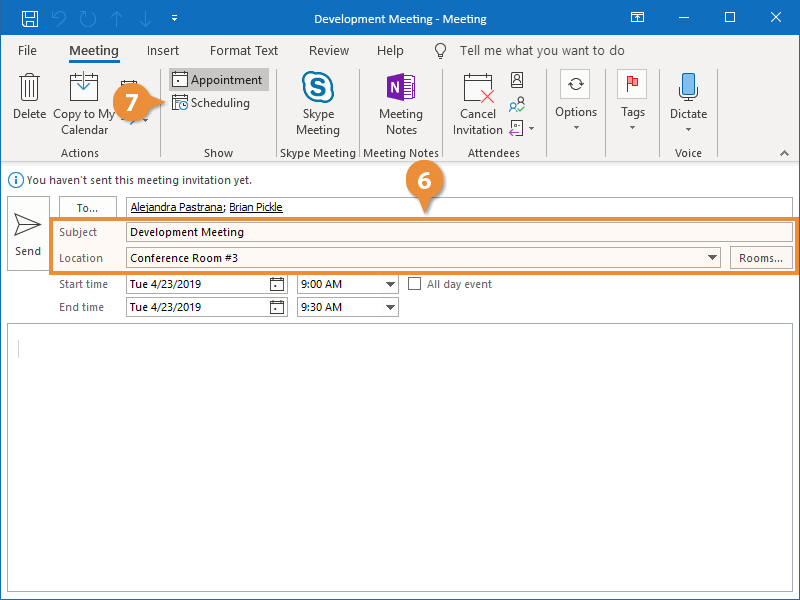
The Scheduling Assistant displays the availability for everyone invited to the meeting.
- If using the Scheduling Assistant, review the attendees’ availability and select a time without conflicts.
- Click Send.
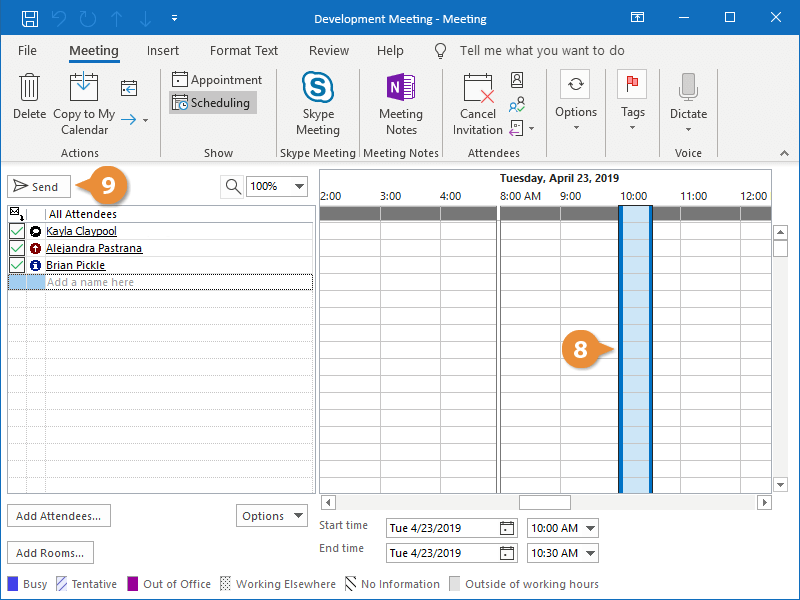
The meeting is created and email invites are sent to the attendees.
Create a Meeting from an Email
You can also create a meeting from an email, which will automatically include everyone involved in the email conversation.
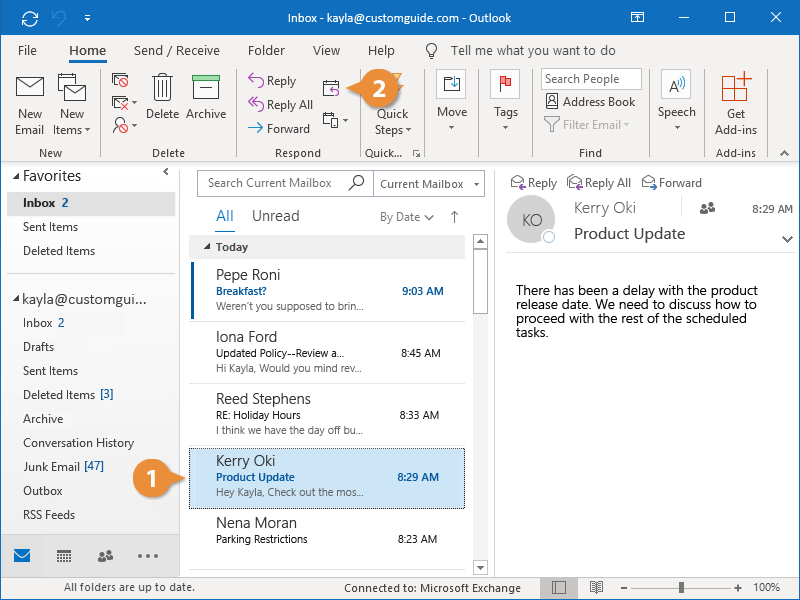
- While viewing your inbox in Mail view, select an email.
- Click the Reply with Meeting button on the Home tab.
Everyone on the email thread is added as a meeting attendee and the subject is populated.
- Fill in the meeting location, date, and time.
- Click in the message field and add in meeting details.
- Click Send.
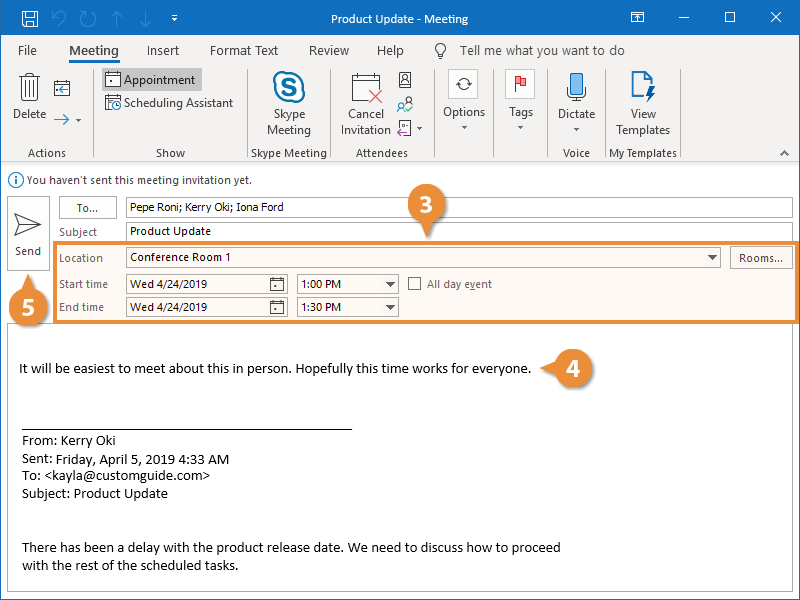
Email invitations to the meeting are sent out to the recipients.
Customizing your Outlook can improve productivity and save valuable time while working on emails. For more Outlook training, check out our posts under News and Insights.